Customers can add and remove Fleet vehicles, assign barcodes, and manage billing, all in Customer Portal.
With Customer Portal, fleet management happens all in one place. Whether you’re running a wash or managing a fleet, the Portal helps keep things organized and running smoothly without the usual headaches.
Assigning Fleet Vehicles
Once the Fleet Manager has purchased a Fleet Plan, they'll need to assign each barcode to a vehicle/driver by entering the contact information for each Fleet car. This step can be completed by a wash employee, or by the customer. Vehicles can be assigned individually, or by bulk upload.
Each driver will receive a confirmation email upon vehicle assignment, which will contain a scannable barcode. Then, they'll simply scan that code at the wash to receive their RFID sticker!
To assign barcodes to Fleet vehicles:
1. Log into Customer Portal (or, if you are a wash employee, open the Fleet Plan and select Manage).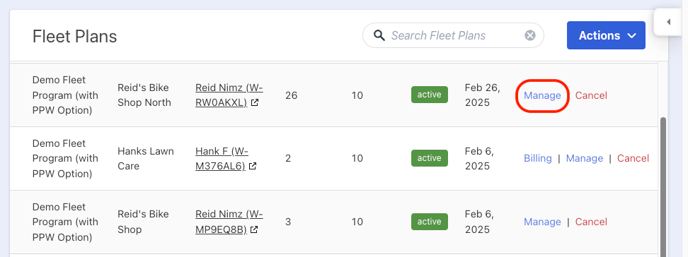
2. Select Manage Fleet. You'll be taken to a new screen where you'll see all vehicles in your fleet.


3. In the portal, you can assign vehicles two ways:
-
- Individually Assign: Under Actions, click Assign in the desired row. Then, enter the Vehicle/Driver information. At a minimum, you will need to enter an email address, but all other fields are optional.

- Bulk Assign: At the top of the screen, select Bulk Assign. You'll be prompted to fill a CSV file with contact and vehicle details for each vehicle. Simply upload the file, and voila!

- Individually Assign: Under Actions, click Assign in the desired row. Then, enter the Vehicle/Driver information. At a minimum, you will need to enter an email address, but all other fields are optional.
Once each vehicle has been assigned a temporary barcode, the driver will receive an email containing that temporary code, which they can scan onsite at the wash to receive their RFID tag.
Adding and Removing Vehicles
To add vehicles:
1. In Customer Portal, select Manage Fleet, then Add Vehicles to Plan.
2. Enter the number of vehicles you'd like to add for each item type, then select Add Vehicles.
3. Repeat the steps listed in "Assigning Fleet Vehicles" above to assign barcodes for each new vehicle, and you're done!


To remove vehicles:
1. In Customer Portal, select Manage Fleet.
2. Click the check box next to all vehicles you'd like to remove. Then select Remove.

Viewing Wash History
Fleet owners can view wash history for their fleet accounts by clicking the Wash History tab in the Customer Portal.
